by
![]()
a.k.a Rudi Greyling
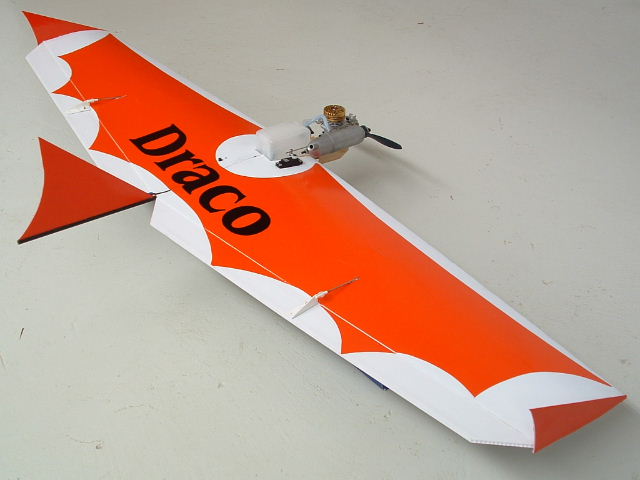
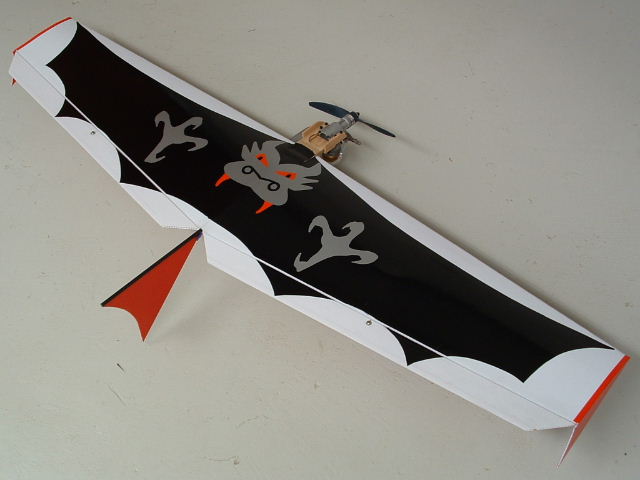
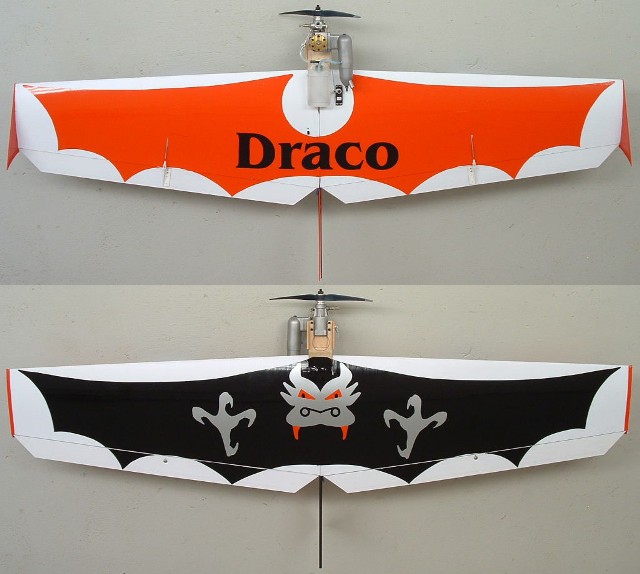
Draco - Terror of the Sky
Open Combat/Fun planeI have just completed a new flexible design that can be used for fun or combat.
I hope you guys like it and many get built!
Since we do not do any combat at my field or a field close to me in South Africa mine will be used for fun.
If you ever do enter into a combat drop me an email, to say how she did.
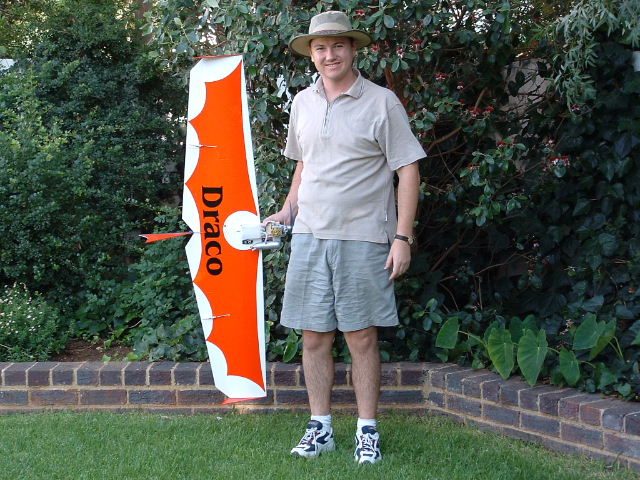
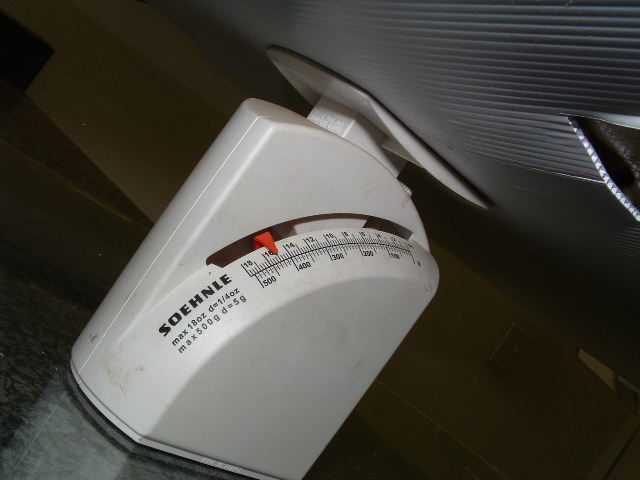
All up weight is less than 1kg or 2lb 7oz
This one has a .32 GMS on but you can fit a .25 on easy.
For "The Draco Movie" click here:
For "Design" discussion click here:
For the "Construction" discussion Click here:
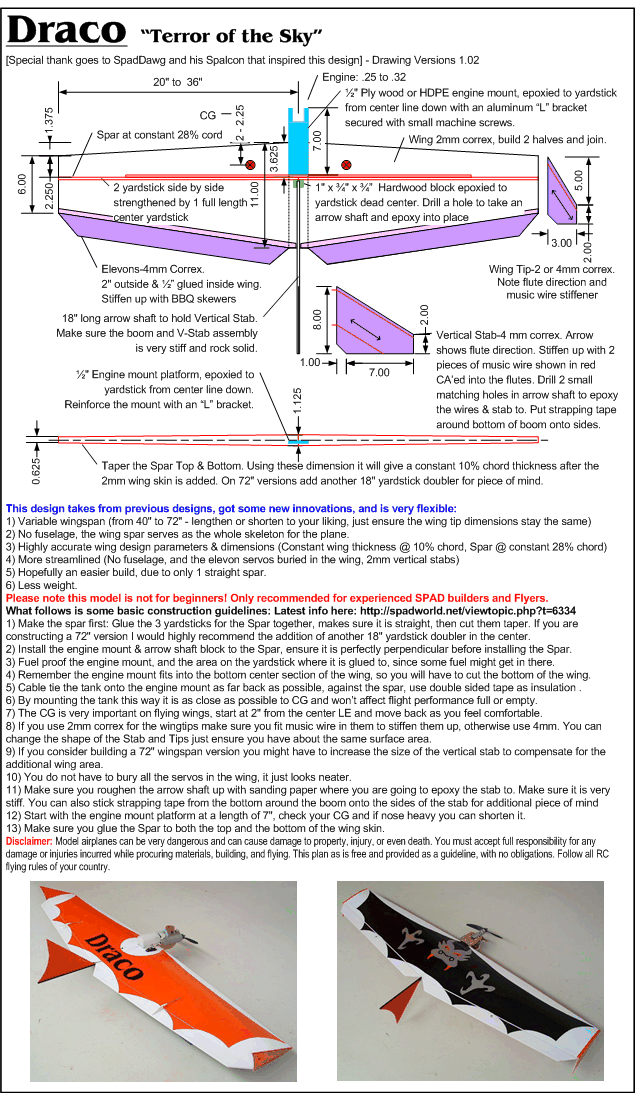
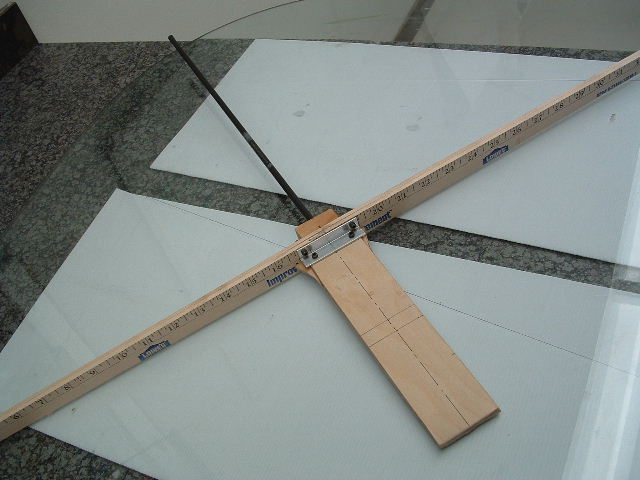
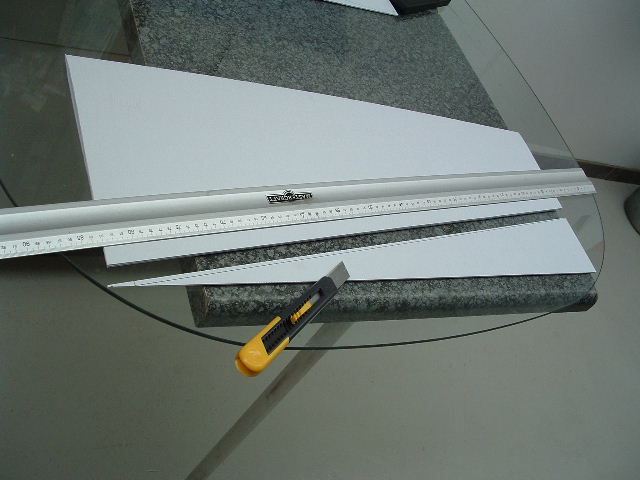
The spar, engine platform and tail boom assembled. Note the 2 wing halves I folded and left over night under a heavy
platform, this case an old table glass sheet. This ensures the wing does not want to jump open when I am ready to start
with it.
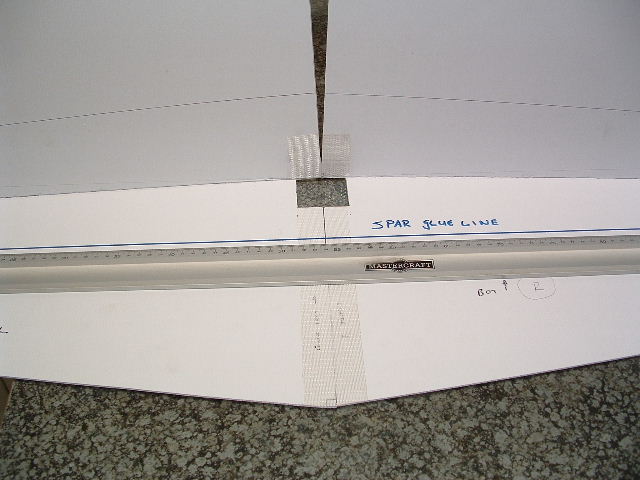
Next I cut the wings square while they are folded up. One can do this since it is a perfect symmetrical wing, so the top
curve should match the bottom curve, when one glue it shut.
Then I joined the 2 wing halves with some strapping tape. Note the spar glue line needs to be perfectly straight all the
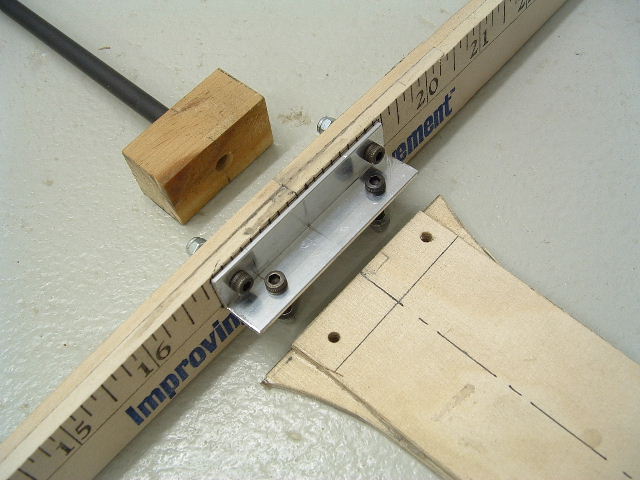
way through. See I also cut a hole for the engine platform to go through.
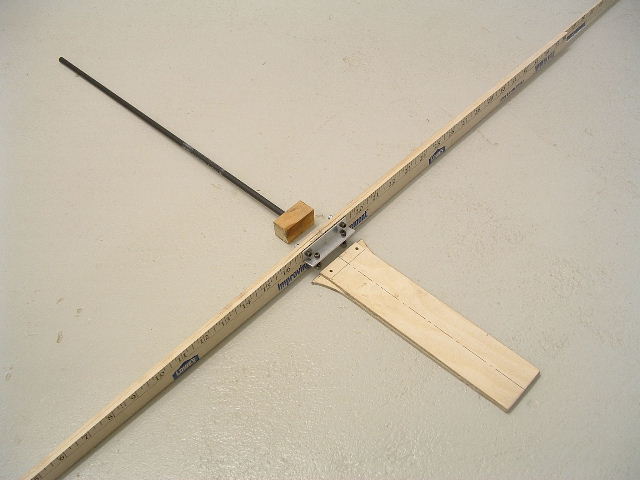
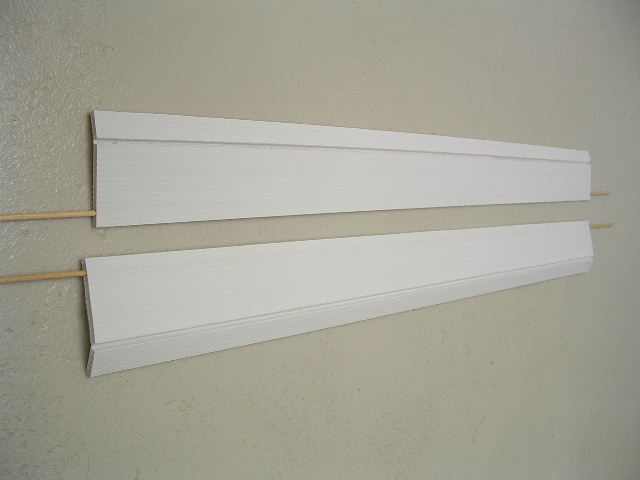
Trail fit of the spar skeleton with the engine platform fitting nicely through the cut hole.

Next up the ailerons. I stiffen them up with 3mm dowel sticks, then run CA down the flute and put them on a flat surface for the CA to cure.
The ailerons glued into place:
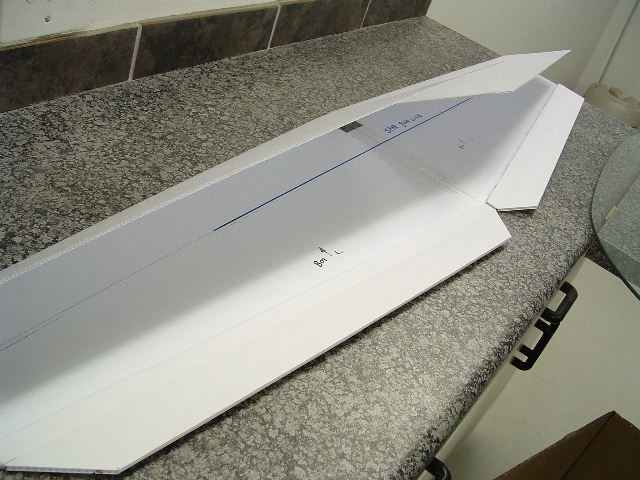
Next glue the spar, the engine mount and the tail boom to the bottom wing skin.
The setup so far weighs in at 15oz. I think the airframe without RC kit will be below 18 oz.
I took the long route to mount elevon servos, inside the wing for more streamlined look. You can take the easy route and
mount them on top. I also did not want to get any flex on the servo that’s why I constructed a small ply wood tray to take the servo and glued it to the spar and the bottom skin.
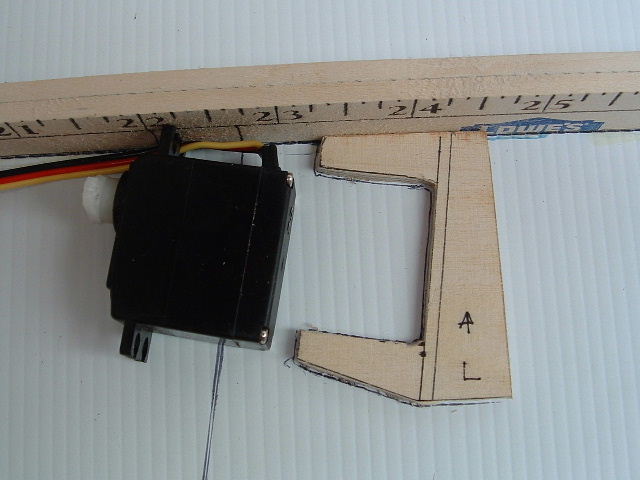
This is what the servo assembly and control horn look like. Note the control rod is 90 degrees to the elevon. The control horn is also the full length of the aileron. I will glue the servo into place after wrapping it in masking tape, but only when the wing is closed up, through a hatch in the wing.

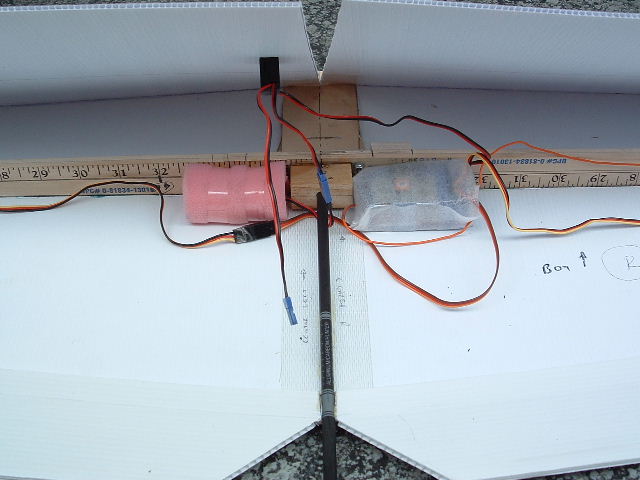
The RC kit is mounted behind the spar. I mounted my battery on the left to compensate for the off center exhaust weight of the engine on the right.
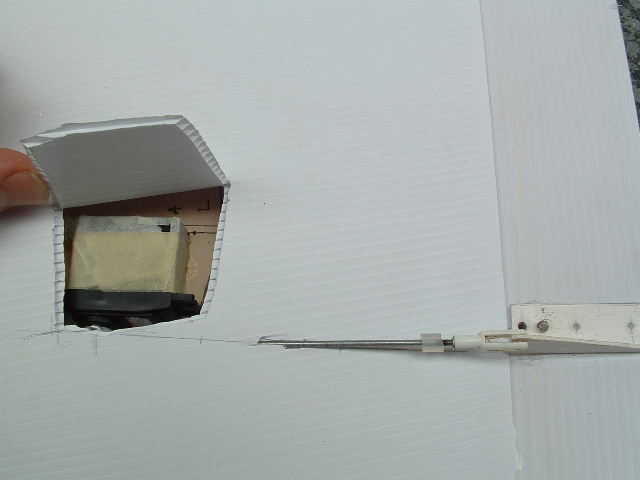
This is how the servos are mounted through a hatch in the wing. The servo is wrapped in masking tape and then glued in.
If I have to remove it one only have to cut the masking tape away. Note the hatch is cut at an angle so one can’t push it through to the inside. Later I will tape them closed.
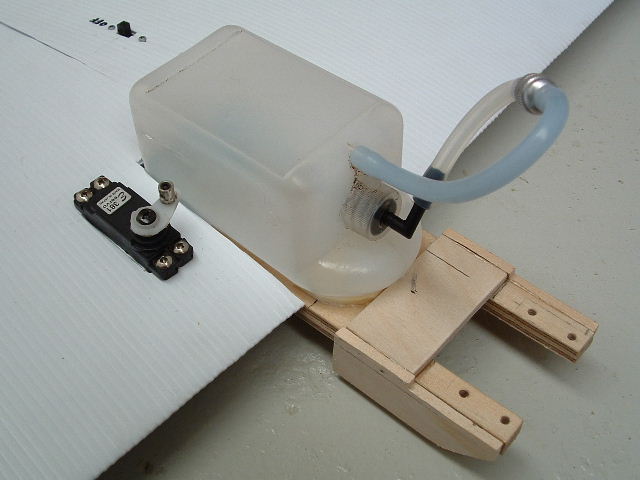
The next picture shows the tank, throttle servo and “bob slay” engine casing protection. The tank sits on double sided tape on top of the engine platform, and is CA’ed to the 2mm wing skin at the back and sides, but I will put a cable tie on as well just to be sure.
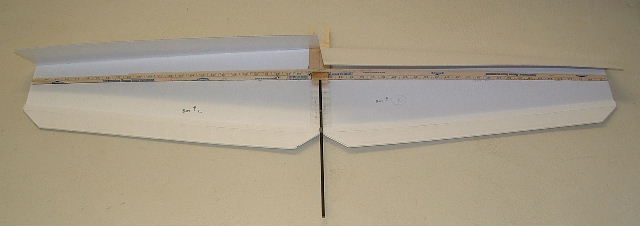
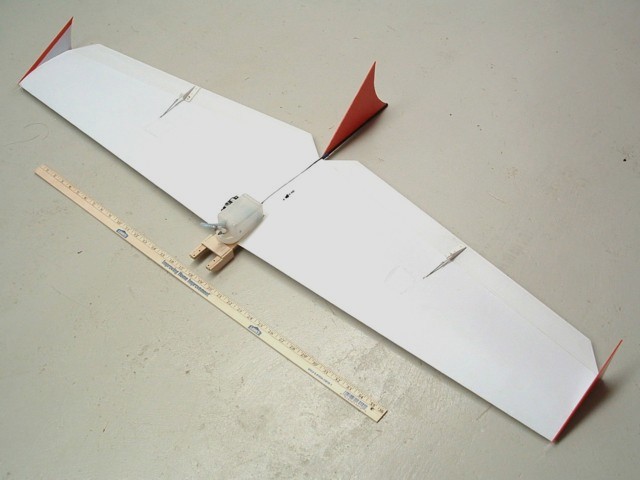
The next picture show the set-up so far all glued up and ready to put the engine on. It is a 56” version (a std 36” yardstick is as reference in the picture, I can just imagine what a 72” version will look like! :twisted: ) The vertical stab was epoxied to the arrow shaft tail boom, and the wing tips CA’ed into place.
BACK to HOME